Dropbox Business to Dropbox Business Cloud File and Photos Migration
Passport & Visa Photos AI APP
Guarantee of Acceptance. Digital + Print
Free! Compliance Check and Photo Editing
Remove Watermark and Re-upload Photo Anytime
No Credit Card Required to Preview Photo
Improve Photos in Seconds
These days, it’s common for businesses to create multiple cloud accounts of the same provider. When businesses set up a new large project, they might create a separate cloud account just for that project. It helps them keep their data private, avoid confusion and potential confidential data leaks.
There are other reasons as well. Here are some of the possible scenarios:
- Businesses often store their data on multiple cloud accounts for backup purposes. Even if the data is lost from one account, it can still be recovered from other accounts.
- Regulatory requirements are also another key reason. Businesses have to comply with the local laws and regulations in the country they operate. Some government regulations require businesses to backup and archive critical data at different locations.
- Another reason to transfer files across the same cloud storages is during business mergers and acquisitions.
Move Files From Dropbox Business to Dropbox Business
There are two methods- manual and automated. We’ll take a look at both of them with their own advantages and disadvantages.
Method 1: Shared Folders Method (Manual)
This is a simple method where you put all the files you want to transfer into a single folder. You share that folder with your other Dropbox Business account. Thereafter, you remove your first account from the folder as the owner.
- Sign in to your Dropbox Business account.
- Click on the New Folder icon.
- Specify a name for your new folder.
- Drag and drop all the files in this folder that you want to share with your other Dropbox Business account.
- Right-click the newly created folder, and select the Share option.
- Enter the email address of the other Dropbox Business account.
- Click on the Share button.
- Your other Dropbox account will receive an invitation email. Accept the invitation.
Benefits:
- It’s a completely free method.
- You do not need to rely on third-party cloud migration services.
- You can transfer as many files as you want without worrying about bandwidth limits imposed by third-party cloud migration services.
Drawbacks:
- This method can be troublesome if you need to regularly move files on a repetitive basis. It will require a lot of manual effort and take time.
- If you enter an incorrect email id while sharing the folder, others can view or download your private business data.
Method 2: Using Easy Cloud Manager (Automated)
Easy Cloud Manager is a cloud-based service that lets you move cloud files across multiple cloud accounts. ECM provides a secure way to manage multiple cloud accounts seamlessly without logging them separately into new tabs, or downloading a single file.
ECM supports many popular cloud services including Dropbox, Dropbox Business, Google Drive, Google Workspace, Microsoft OneDrive, OneDrive for Business, Box, pCloud, and more.
- Visit the Easy Cloud Manager website and create a new account.
- Click on Home > Add Cloud Drives.

- Select Dropbox Business.
- Add your first Dropbox Business account.
- Repeat over the same process to add your second Dropbox Business account.
- Click on the Operations tab.
- Click on Data Transfer.
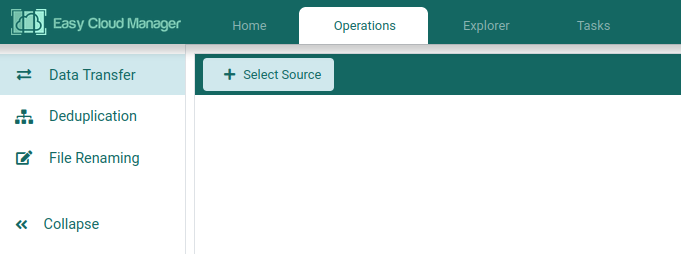
- Click on Select Source.
- Select the folders in your first Dropbox Business account you want to transfer.
- Click on Select Target.
- Select a destination account in your second Dropbox Business account.
- Optional: ECM provides numerous file filtering settings. For example: You can skip files over/ below specific size. You can also exclude files by their types (such as documents, images, videos, music, archives). You can also exclude files older/ newer than specific date.
- Click on the Transfer Now button to start file transfer. If you wish to transfer your files at a later time, use the Schedule Task button.
Benefits:
- ECM supports both individual and business plans of numerous cloud services
- ECM is 100% secure. It uses the official APIs method from your cloud service provider to safely access your files.
- You can explore the contents of your cloud accounts in one place.
- You can search for files across multiple cloud accounts.
- You can find and remove duplicate files from your cloud accounts without downloading them
- You can batch rename files using numerous renaming rules (for example: Add an incremental number at the end of the file name, change capitalization, remove specific characters, or swap text)
Drawbacks:
- It’s not free
- You will need to provide temporary file access permissions to ECM